Wallpaper Over Textured Walls: What Works and What Doesn’t
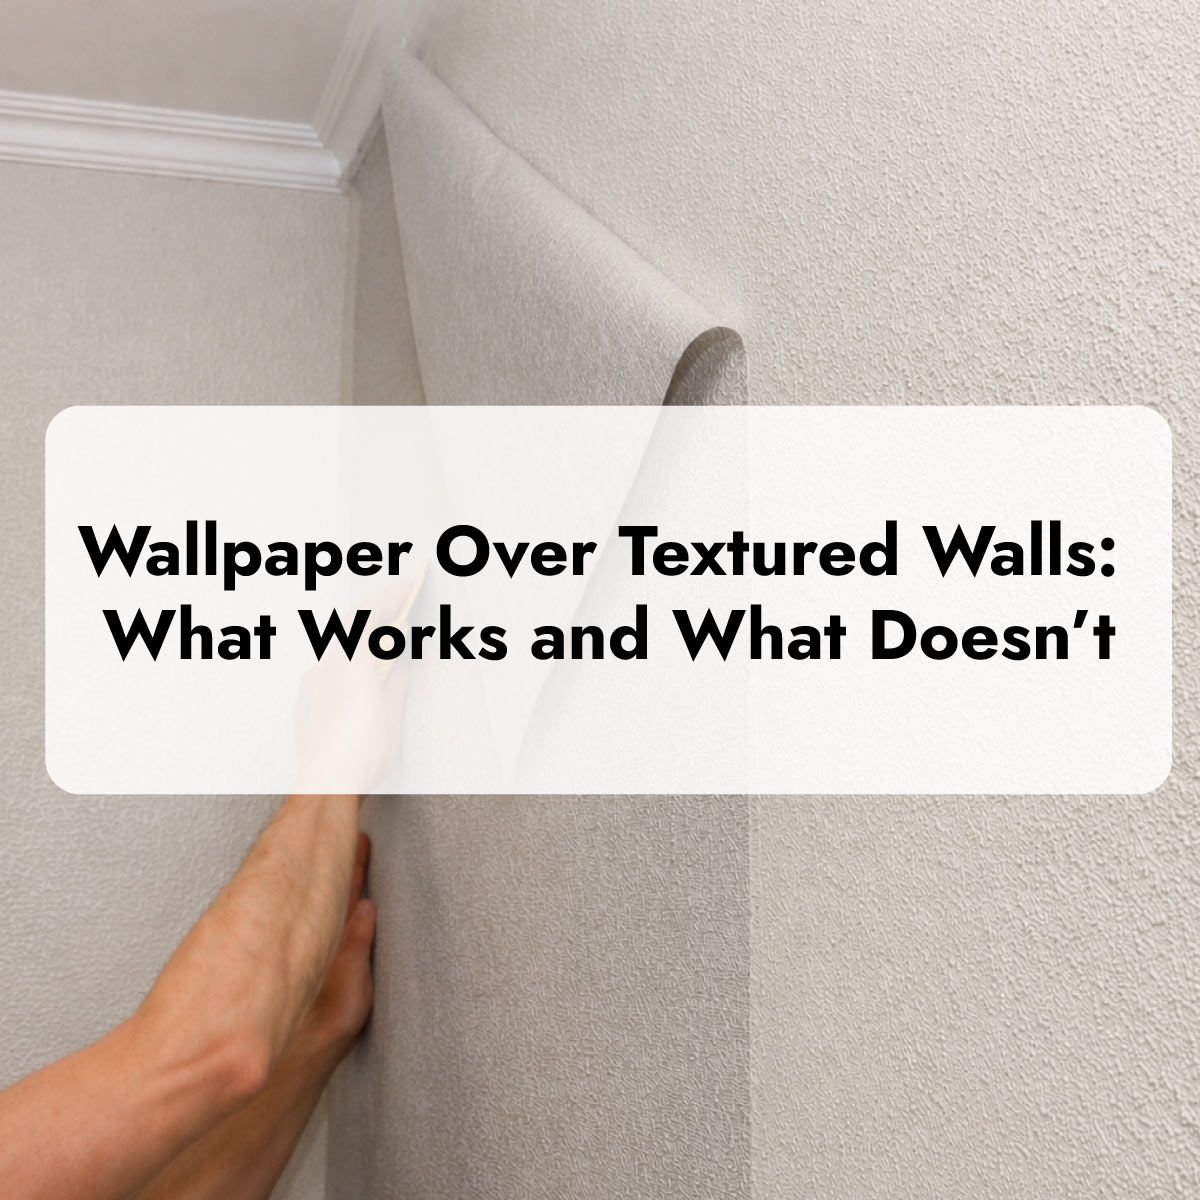
Trying to find out how to install wallpaper on textured walls? You’re not alone. Many home surfaces aren’t perfectly smooth, and when sanding or repainting isn’t allowed, wallpaper can feel like the only option to hide uneven textures. While wallpapering over uneven surfaces is not entirely off the table, there are a few things to consider.
Can you wallpaper over textured walls?
First and foremost, the type of wallpaper is crucial in determining whether it’s going to peel off in a couple of days or actually stay put long-term. Many textured surfaces reduce the amount of contact the adhesive can make with the wall. That’s where the problems start.
Non-pasted wallpaper over textured walls
Non-pasted wallpaper over textured walls usually works better because you can use stronger adhesives rather than relying on a pre-applied backing. Additionally, the wallpaper paste itself fills in small gaps and low spots, improving contact between the wall and the wallpaper.
Peel and stick wallpaper over textured walls
Peel and stick wallpaper over textured walls is much less forgiving. As this type of wallpaper is usually used in rental properties to avoid leaving damage, the glue layer is thinner and less aggressive, so it can’t fully bond to uneven surfaces. Also, the wallpaper’s thickness matters because the underlying texture will probably show through.
Wall textures that can’t be wallpapered over
But maybe you’re wondering – what sort of texture is too much? There are quite a few wall texture types, and not all of them are unsuitable for wallpapering.
Of course, wall textures that can’t be wallpapered over really depend on how much prep work you’re willing to put in to make it possible. From sanding down rough surfaces to applying spackle and smoothing out imperfections, many textures can be improved with the right approach. That’s why we’ll take a closer look at different wall textures and how workable they are for wallpapering.
Here are some wallpaper surfaces you should avoid when using peel and stick or non-pasted wallpaper. If these textures are not smoothed out first, the wallpaper will not stick properly, and all that time and money you put into this project may go to waste. But smoothing these types of walls takes a lot of time and effort, because of the hard materials they’re made of. This will not work if you want a quick and easy interior fix.
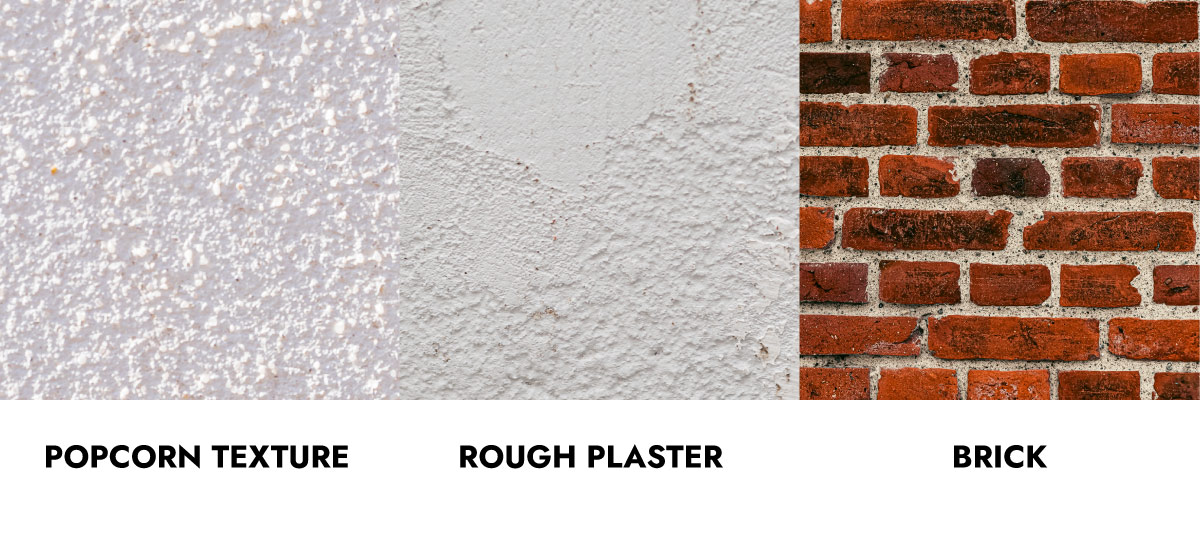
Popcorn texture walls
Popcorn-textured walls are extremely uneven and brittle. They’re made of a mixture of watered-down drywall joint compound and styrofoam beads. This creates bumps and grooves, which means the wallpaper won’t adhere properly because air is trapped in areas the wallcovering can’t reach.
The only option you have if you want to wallpaper this wall is to remove the texture. This can be tricky if you have an older home. Popcorn textures installed before the 1990s, especially in the 1970s, often contained asbestos, which can be very toxic if removed.
We don’t recommend starting renovations unless you’ve had your wall tested for asbestos-containing materials.
Rough plaster walls
Rough plaster walls have long been used in interior finishes, but they have become especially popular in newer homes for their modern, industrial look. Although visually appealing, these textured surfaces can be difficult to wallpaper. The deep bumps and grooves often prevent wallpaper from adhering properly, resulting in air pockets, lifting edges, and an uneven finish.
Brick walls
Brick is one of the main surfaces you should avoid wallpapering. Its heavy texture will always show through, whether you use peel and stick or traditional wallpaper, and the end result will not look good. The deep grooves and uneven surface make it hard for wallpaper to adhere properly, so you’ll end up with a rough, unfinished look and a distorted wallpaper pattern.
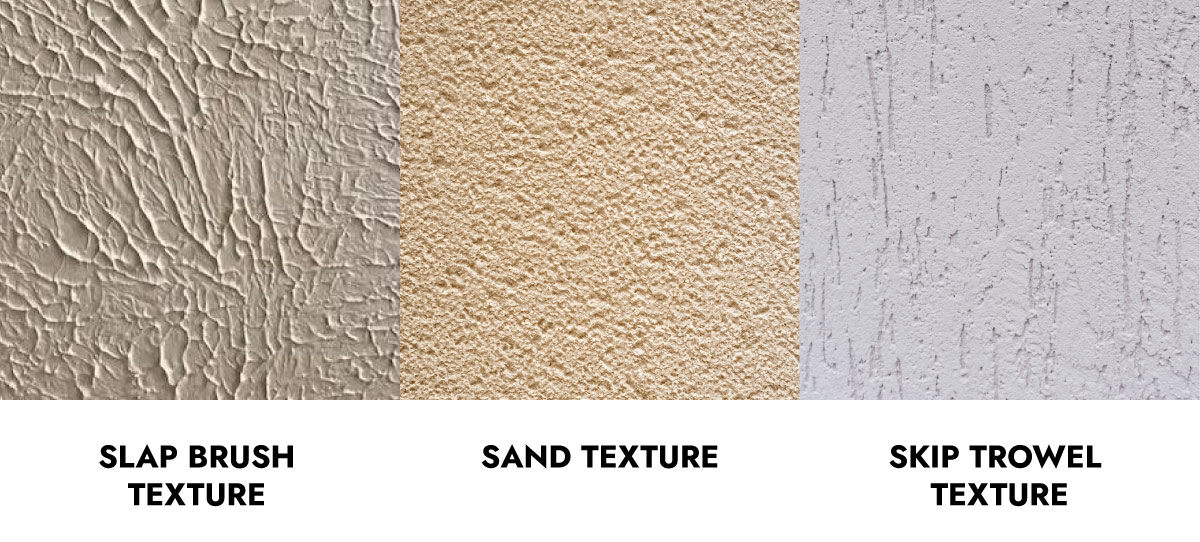
Slap a brush texture on the walls
Slap brush texture walls are created using drywall compound and a specialized brush to achieve a bold, textured, and dimensional finish. This technique forms raised, fan-like patterns with uneven peaks across the surface.
Because this texture is made from a semi-hard compound, applying wallpaper directly over it is not recommended. The uneven surface will cause the design to show through, especially with peel and stick wallpaper. In addition, the raised peaks of the texture prevent proper adhesion. As a result, the wallpaper cannot fully bond to the wall, which can lead to lifting edges, air gaps, and a shorter lifespan of the installation.
Sand-textured walls
Sand-textured walls are usually found on the outside of homes, but some people also use them on their interior walls.
Sand-textured walls are created by adding fine sand to paint or drywall compound, giving the surface a slightly rough, grainy feel.
Although this texture is not as bumpy as some others, it still has small, gritty particles. It’s best not to put wallpaper directly over it. The rough surface makes it hard for wallpaper to stick, and the texture will show through, changing how the wallpaper looks.
Skip trowel texture
Skip-trowel texture walls are created by applying drywall compound with a trowel in a light, skipping motion, leaving an irregular pattern of raised areas and smooth sections.
As with other joint compound designs or textures, this creates an inconsistent surface, reducing proper adhesion. As a result, wallpaper may struggle to bond evenly, leading to weak spots, lifting edges, or visible imperfections once applied.
How to apply wallpaper to these types of walls?
If you want to swap out your wall texture for wallpaper, getting the surface ready is key. Start by sanding or smoothing out any uneven spots. Heavier textures like popcorn ceilings, rough plaster, slap brush, and sand finishes need to be leveled so the wall is flat and even.
When you have sanded til the surface is smooth, you can skim the surface by coating it in a thin layer of joint compound or plaster to be sure that there are no holes and raised bits left. Then it’s back to sanding. Finally, apply a primer to ensure the wallpaper adheres evenly and securely.
Wall textures that aren’t totally off-limits for wallpaper application
These wall textures can work for wallpaper under certain conditions, without the need for extensive renovation.
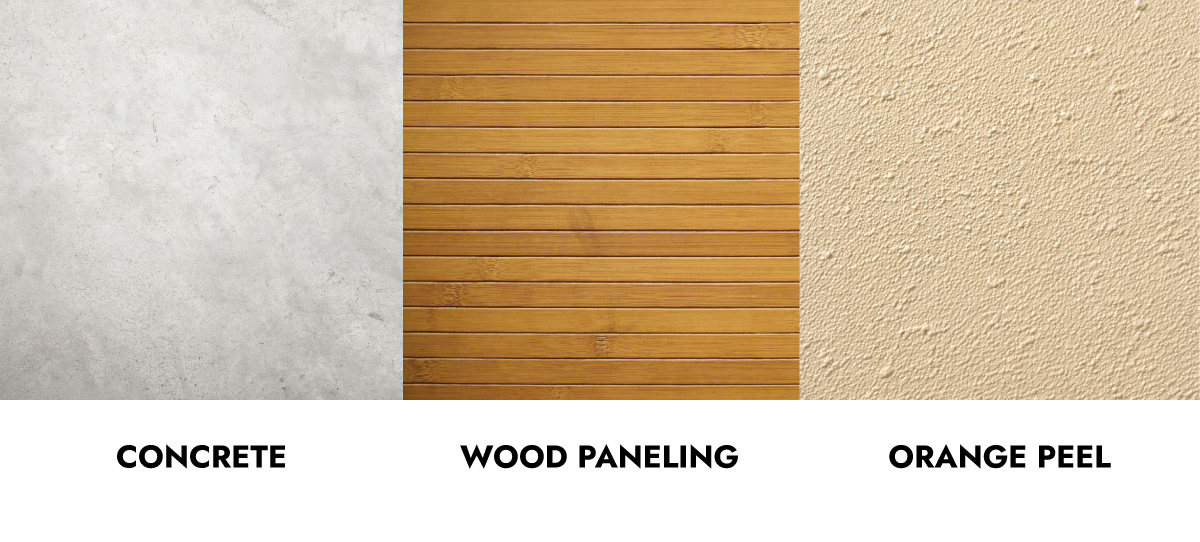
Concrete walls
Concrete walls can range from being relatively smooth to rough and porous. If you have a smooth concrete surface, you can apply wallpaper successfully with the right preparation. Start by cleaning the wall thoroughly and applying a high-quality primer or sealer to reduce porosity and create a stable base for adhesion.
Wood paneling
Wood paneling, including shiplap, slats, and beadboard, has visible grooves. As with brick walls, the grooves and seams will show through the wallpaper and cause it to lift over time. For the best results, the surface should be prepared before installation. This includes filling the grooves and seams with joint compound, sanding the wall smooth, and applying a primer to create an even, stable base. Once properly prepped, the wall becomes suitable for wallpaper and allows the design to appear clean and flawless.
Medium orange peel textured walls
Orange peel textured walls are one of the more common finishes, especially in modern homes, and they fall somewhere in the middle when it comes to wallpapering. If the texture is subtle, it can work for this sort of project, that is, if the grooves themselves are not too big. It is important to ensure your walls are clean, dry, and properly primed before applying wallpaper, as this helps improve adhesion and creates a smoother, more reliable finish.
Prepare properly
Whether you can wallpaper over textured walls really comes down to the type of texture and how much preparation you’re willing to do. Smooth or lightly textured surfaces, like orange peel, can often work with minimal effort, while rough plaster and brick surfaces usually require significant prep, such as sanding, skim coating, or even installing a liner paper, to achieve a clean result.
Taking the time to properly prepare your walls will make all the difference in how your wallpaper looks and lasts. A smooth, well-prepped surface ensures better adhesion, fewer visible imperfections, and a more polished, professional finish overall.